So its been a very long time since i blogged, me and technology you know, lol.
But i have been having a play around this month. We are in the middle of giving our converted mill a spruce up so i wanted somewhere to store my ideas and decorating inspiration, smash book style, but i just couldn't find a folder or album suitable enough. So i decided to have ago at making my own. I had spare A4 ring binders floating around so decided to start chopping them up.

So here goes, a step by step tutorial on how i made the book.
MaterialsStencils and masks
Gel medium
Old paintbrush
Tissue paper in light and dark colours
Heat gun
Heatproof mat
Spray inks
Water mister
Kitchen roll
Hair bobble or elastic
Large button
Needle and thread
Doodle pen
Cutting mat
Sharp cutting knife
Metal ruler
Pencil
Strong adhesive tape
Pokey tool
InstructionsStart by taking a plain A4 folder. Lay your folder flat onto a cutting mat.

Taking a pencil, mark 2” from the top of the folder. Draw a line all the way across the folder. Using a fresh, sharp knife, carefully cut across the line. Retain the off cut for later. Repeat the process with the bottom edge.


Lay the folder flat again. Using a pencil, mark 6.5” from the spine fold. Draw a line all the way across the folder and carefully cut across. Repeat on the other side of the folder.

Next take one of your off cuts and cut in half. This will form your flap. This should be the same size as the folder, if not, trim to fit. Repeat with the second off cut.

Take your adhesive tape and lay it along the edge of the folder. Carefully place your off cut on the tape, leaving a gap of a few mm and press down firmly. Cut another piece of tape the exact size of the off cut and place over the gap (ie front). Use a bone folder to push the tape into the gap as this will make it bend easier and the tape wont be tight and split. Repeat the process with the second off cut. I cut of my corners on the flap at this point but your can leave them square if you want.


And that is your folder complete. This folder has one flap for closing. But you can use your other off cuts to make a flat pocket on the other side if desired.
Next its time to prepare for decorating. I took some tissue paper and cut it into strips. I used a darker one first as my folder was red so I needed something darker to cover the red. Give the folder a good covering of gel medium and brush the tissue paper down with a brush. It doesn’t matter how rough you do this as it all adds to the texture of it. Cover the front and back in tissue paper. I gave my folder two coats of dark tissue and two coats of light tissue. I left mine to dry naturally in between but you can speed it up with a heat gun if impatient.


Once fully dry, use the
stencil, ghosting techniques to decorate the folder, inside and out.

Again once dry, its time to add a closure. I wrapped elastic around my folder on this one but on my second one i used a hair bobble. For this method I punched a small hole in the middle of the flap and added a hair bobble. But you can use other products such as shearing elastic, string, twine, ribbon etc. Next take a pokey hole and punch 2 holes in the centre of the front folder. Don’t have them too close together. Take a strong thread and begin to thread through the button and holes. Pull tight. This is why the holes should not be close as the thread will pull through the holes.
Decorate the front cover as desired.
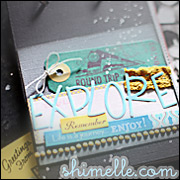
And that is your folder complete. They are very sturdy and look fabulous. Below is another one i am making for the new shimelle class Explore.
More images below of my smash book


And here is my explore album


TFL and i hope i have inspired you to recycle those folders.
CHRIS